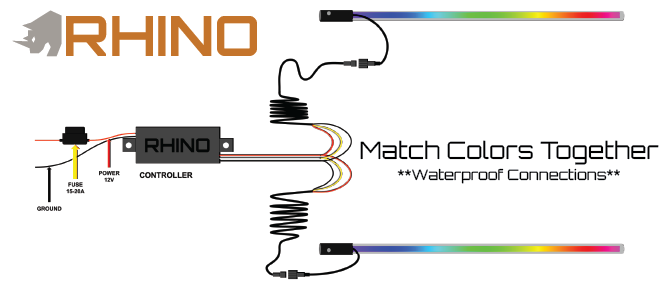
Whip Light Wiring
Precautions & Tips
Do NOT mount the controller near any heat source! This will causing failure of the internal components. The ABS housing can withstand greater heat then the internal components.
Whips only Wiring
We review how to connect whip lights to the Rhino controller. We explain the connection points plus a few tips.
Guidelines
- Give enough slack for pigtail to flex on the spring to avoid stretching the pigtail to the breaking point.
- Keep the whips safe from flexing into a cage or any hard objects to preserve the longevity of the whips.
- Cut the pigtail wire from whips to length before you connect to the controller for best performance.
- Use zip ties to secure your flag to the whips
- Make sure your clevis pin that secures your whip to the spring/base is always secured
- A spring is required to be used for any whip 2ft or longer to be covered under warranty
- Do NOT extend the whip wire over 10 feet, doing so can reduce the data signal and causing flickering
Whip Light Diagram