Modular by design · Built in North Carolina
One Pod. Endless Configurations.
Run one. Pair them. Link up to twenty into a bar you specify — the same light, the same brackets, the same parts.
24,000 lux measured at 4 ft ~36,000 cd beam intensity 36 W per pod
Measured on the finished pod with the production optic installed — not calculated from an LED datasheet.
The light bar isn’t the product. The pod is.
Start with one. Pair them. Link them into exactly the width and shape your build needs.
A standalone auxiliary light, on the bracket it ships with.
Shop a single podRun one a side, mounted separately — or link them into one unit.
Build this setupThe first configuration that is unmistakably a light bar.
Build this setupKeep building.
Link additional pods to create the width your vehicle and mounting location need.
Pick a configuration above to start with it — pairs and linked bars open in the builder.
Shown to relative scale. Widths represent pod housings before bracket and link spacing.
What are you building?
Every option below opens the same builder — it just starts you in the right place.
RHINO-DESIGNED BOARD
Our Board. Our Firmware.
A high-power emitter on a board Rhino designed, running firmware Rhino wrote, inside a housing Rhino machines. When something needs changing, we change it — we are not waiting on a supplier's next revision.
That firmware watches the housing temperature and manages output to protect the emitter, and the fin pattern is cut to move that heat. Thermal protection is a real function of the board, not a sticker on the box.

LOW TO HIGH SPEED
See Further. Ride Faster.
A LEDiL precision TIR optic chosen specifically for throw.
Every pod we ship today uses the same spot optic. It is a distance pattern, built to reach down the trail and light the corner before you are in it, rather than a wide wash close to the bumper. Run a pair on the pillars for reach, or a linked bar for reach plus width.


LINKABLE POD LIGHTS
Build Your Own Light Bar.
The same housing mounts on its own or bolts to the next one — link up to 20 pods into a single straight or curved run.
Flat (0°), 5° and 10° linking brackets set the angle at every joint, so a run can track a bumper line or fan outward for spread. Twenty is the ceiling the builder enforces, and it works out the bracket count for whatever you land on.
MODULAR, AND WHY IT MATTERS
A Light Bar Shouldn’t Determine Your Lighting.
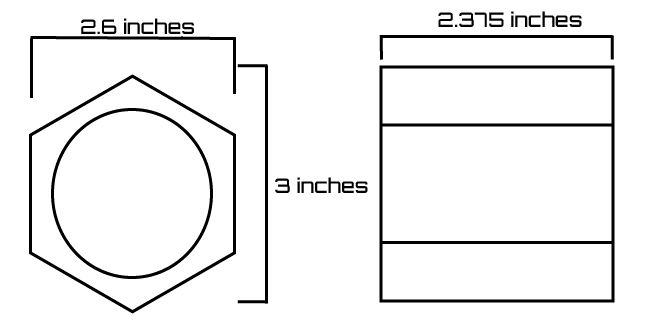
A fixed bar is 20 inches or 50 inches because that is the mould it came out of. Yours is 2.6 inches at a time.
Start with one. Add later.
Buy a single pod this season and a second next season. Pods are priced and sold one at a time, and nothing you already own becomes obsolete when you expand.
Build the width you actually have.
Each pod is 2.6″ of housing, so a six-pod run is 15.6″. You are matching the space on your bumper rather than picking the closest bar off a shelf.
Angle them to shape the beam.
Flat, 5° and 10° linking brackets set the angle at every joint independently. Run them straight for reach, or fan the outer pods for spread — same pods, different pattern.
Replace one module, not the bar.
Damage one pod in a linked run and that pod comes out while the rest stays on the vehicle. The housing is bolted together, not potted shut.
One core pod platform across your build.
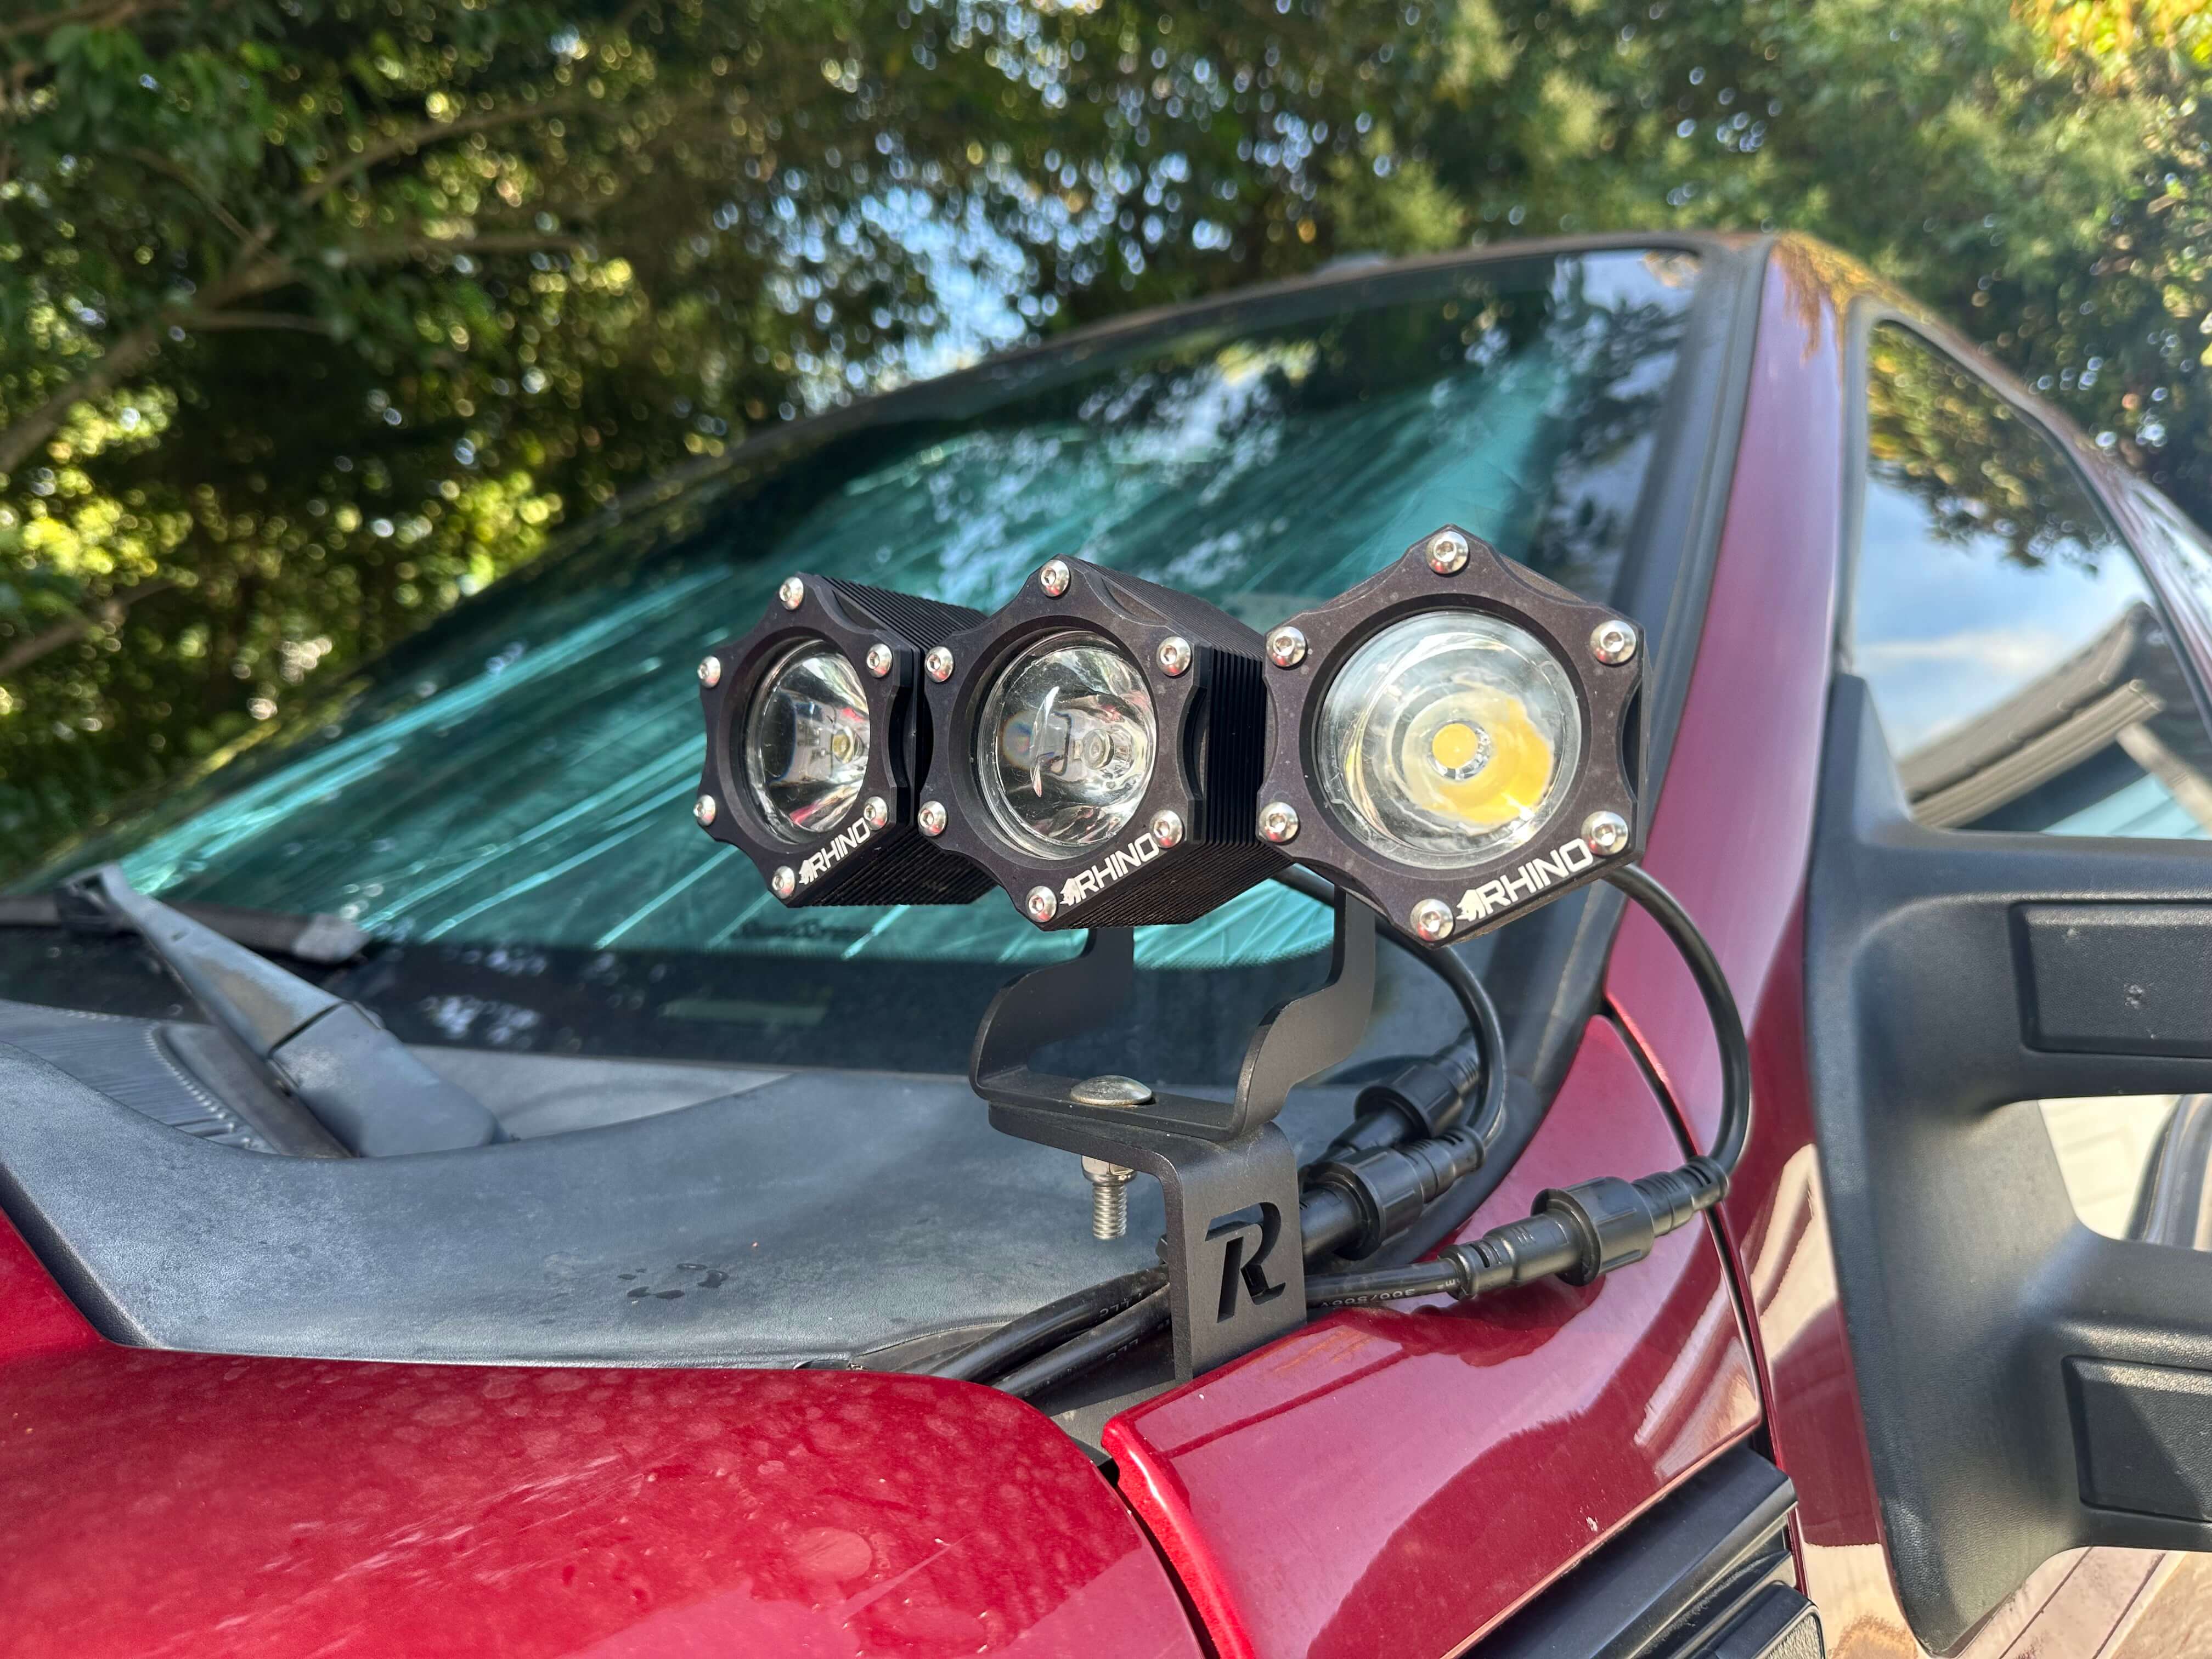
Run them independently, link them into a bar, or integrate the same pod platform into vehicle-specific lighting systems like our RZR Pro R headlights.
Change your mind later.
Pods bought separately link into a bar with $10 of hardware. What you decide today does not lock in what you decide next year.
THREE LAYERS, THREE JOBS
The Colour System, Plainly.
A Rhino pod puts out light in up to three separate ways. They are independent, and only one of them is RGB.
1. The beam
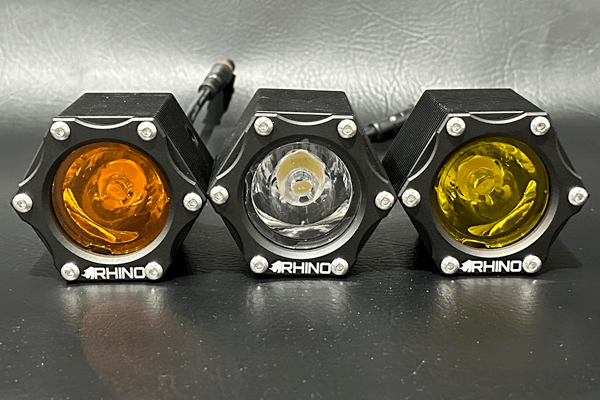
The forward light you actually drive by. One high-power emitter behind a precision TIR optic, in a spot pattern. The beam is always white — what changes is the lens in front of it.
ClearAmberYellow
Lens colour changes the colour of the beam, not its job.
2. The accent
A second, separate LED channel inside the same window, forming a ring around the beam. It runs on its own, so you can have accent only, beam only, or both. It is a fixed colour, chosen when you order.
AmberRedBlueGreenWhite
Catalog labels read accent/beam — “Blue/White” is a blue accent with a white beam.
3. The RGB ring Optional
Separate hardware that seats in the bezel, outboard of the accent ring. This is the only full-spectrum part of the pod — any colour, run from the Rhino Bluetooth controller, on the RGB system.
Full colour, app-controlled
Bought per pod. Add it in the builder, on any lens and any accent colour.
If I pick Blue/White, do I already have an RGB ring?
No. Blue/White is a blue accent with a white beam — both fixed colours, built into the pod. The RGB ring is a separate add-on and is not included with any lens or accent choice.
Is the RGB ring the same thing as the accent?
No. They are different hardware in different places on the pod. The accent is inside the window and runs one fixed colour for the life of the light. The RGB ring sits outboard in the bezel and runs any colour you want. You can have either, both, or neither.


VERSATILE MOUNTING
Mount It Your Way.
Whether you need a single pod on your A-pillar or a complex triple-pod setup, we have you covered.
We have multiple mounting options that allow you to build your perfect lighting setup. With our end brackets, rear mounting, or the single mounting option, you have the flexibility to put the lights exactly where you want them.


MACHINED IN NORTH CAROLINA
Strength Redefined.
The housing is machined from 6061 aluminium, assembled and tested in North Carolina — strength you can stand on, literally.
We drove a Jeep Grand Cherokee onto a pod to see what it would do. It kept working. Design, board, firmware, machining, assembly and service all happen here; the emitters, like everyone's, are bought-in silicon.

UNIQUE DESIGN
Small Housing. Full-Size Optic.
With its compact size, it allows for a lot of mounting location options without sacrificing performance.
2.6 inches wide and 3 inches tall point to point, built around a high-output spot optic and drawing a measured 2.5 A at 14.4 V. Small enough for an A-pillar, and it still reaches down the trail.
OPTIONAL RGB RING
Function When You Need It.
Colour When You Want It.
The beam is the reason you bought a pod light. The RGB ring is the reason people ask about it in the car park.
The ring is a separate part that seats in the bezel around the lens, and it does not touch the beam or the accent — run the pods as pure work lights on the trail, then run the ring however you like when you are parked. Priced per pod — add rings to the whole build in the builder, or call us for a mixed set.
Runs on the Rhino RGB system
The same Bluetooth controller as your other RGB products.
Not RGB+W. Axion rock lights and Rhino 3.0 whips are a separate architecture — the pod ring does not join that system. Running both on one machine is a wiring conversation worth having on the phone.
Add it in the builder on any lens and any accent colour, and the price updates as you go.
Build a pair with RGB ringsMake the rings part of the vehicle
BETA · Pre-orderThe ring already runs on the Rhino RGB system. The RhinoLink Bluetooth Controller is what lets that system take its cues from the vehicle: the pod rings become a zone of their own — one of 5 — next to Diamond RGB rock lights, RGB whips and halos. Give each side its own zone and a left turn signal takes the left rings to amber; when the signal releases, that zone goes back to the pattern, colour and brightness it was running.
The ring is the part that joins the system — not the beam. The beam is not an addressable zone and the accent ring is a fixed colour chosen when you order; neither becomes full colour. A beam can be switched from one of the controller's 8 relay outputs through an appropriately wired external relay, which is a different job from running colour.
See what RhinoLink can doBETA pre-order — first production units are preparing to ship.
RhinoLink controls auxiliary and accent lighting. It is not a replacement for required factory vehicle lighting. Lighting regulations vary — check local requirements before public-road use.
OWNERSHIP
Serviceable. Not Disposable.
A pod that fails should be a repair, not a landfill decision and a fresh order.
The housing comes apart with ordinary tools. The parts that wear or get broken — brackets, linking hardware, the RGB ring — are stocked as their own items, so replacing one does not mean replacing the light. We designed the board and wrote the firmware, which means we can actually diagnose one that comes back instead of swapping it sight unseen.
Damaged a pod in the middle of a linked bar? That pod comes out and a new one goes in. The rest of the assembly stays on the vehicle.
Talk to us about a repair- Comes apartStandard fasteners, not glue and hope.
- Parts are partsBrackets, linking hardware and the RGB ring are all stocked separately.
- We know the boardRhino designed it and wrote its firmware.
- Service happens hereSame building in North Carolina that machined it.
MEASURED, NOT CALCULATED
We Measure the Finished Light.
Every figure below says how it was obtained. Where we do not have the test to back a number, we say that too — and where we do, here is the meter reading.
That measurement comes from the finished pod with the production optic installed — a light meter in front of a light we built, not a number worked out from an LED datasheet.
Different distance. Same beam-intensity result.
Move the meter more than twice as far away and the reading drops by two thirds — but work it back to beam intensity and both tests land on roughly the same number. Two independent readings agreeing is why we publish ~36,000 cd and not a figure with five digits of false precision. Read on a Dr.meter LX1330B digital lux meter.
Lumens, lux, candela — they measure different things
Total light produced. It is the number the industry compares on, and it is a fair one — but raw lumen figures are commonly calculated from LED manufacturer specifications rather than read off the finished light.
Light landing on the target. It is what we can directly measure from the finished Rhino pod with the production optic installed, which is why we publish the measurement, the distance, and how we got the number.
Beam intensity — how hard the light pushes in the direction you aimed it, and the figure that tracks throw. Derived from the lux reading and the distance, never measured directly.
Measuring total lumens properly needs an integrating sphere. We do not own one, so we do not publish a lumen figure and call it measured. These are bench figures at the stated point — not a promise about every installation, because wiring, voltage drop and battery state all move them. How we measure →
Want to see the method rather than read about it? Our Axion rock light was read on the same bench standard — 13 in, supply near 14 V — alongside two competitor samples we bought, with the meter and supply photographed for each. Different product, same method. See the Axion bench readings →
- Size: 2.6" wide × 3" tall
- Housing: CNC-machined billet aluminium, black anodised
- Operating voltage: 9 – 18 volts
- Emitter: Cree XHP70.3 high-output LED
- Optic: LEDiL precision TIR optic — spot pattern
- Lens options: Clear, amber or yellow
- Accent colours: Red, blue, amber or green as a secondary colour on a clear lens; white on all three lenses
- Protection: Firmware-controlled thermal management and reverse polarity
- Linking: Flat (0°), 5° and 10° brackets, up to 20 pods in one run
- Optional: RGB ring add-on, per pod
Ready to Build?
Choose your lens, your colour, and exactly how many pods you need.